The Secret to Crispy, Flavor-Packed Smoked Chicken Thighs on a Pellet Grill
There’s something magical about perfectly smoked chicken thighs—tender, juicy meat infused with smoky flavor, all wrapped in a crispy, caramelized crust. If you’re looking to elevate your grilling game and impress your friends and family, you’ve come to the right place!
As a passionate home cook and BBQ lover, I’ve experimented with countless ways to perfect smoked chicken thighs on a pellet grill. Whether you prefer bone-in or boneless, skinless thighs, this guide will walk you through every step to achieve crispy, flavor-packed perfection. Plus, I’ll share my top grilling tips, favorite BBQ backyard ideas, and must-have products to make the process even easier.
Let’s fire up the smoker and dive in!
This post may contain affiliate links at no extra cost to you. Please read our full disclosure here to find out more.
Why Choose Chicken Thighs for Smoking?
Chicken thighs are the ideal cut for smoking because of their higher fat content, which keeps them juicy and flavorful. Unlike chicken breasts that can dry out easily, thighs remain tender, even when cooked low and slow.
Bone-In vs. Boneless, Skinless Thighs
- Bone-in, skin-on thighs: Perfect for achieving crispy skin and deep smoky flavor. The bone helps retain moisture, and the skin crisps up beautifully on the pellet grill.
- Boneless, skinless thighs: A great option if you want a quicker cook time or prefer leaner meat. These absorb marinade flavors well and are excellent for slicing into salads or wraps.
Both options are delicious, so choose based on your preference!
Essential Ingredients & Equipment
To achieve the best-smoked chicken thighs, you need the right ingredients and tools.
Ingredients
Equipment
Step-by-Step Recipe for Smoked Chicken Thighs on a Pellet Grill
1. Prepping the Chicken
1. Pat dry the chicken thighs with a paper towel.
2. In a small bowl, mix smoked paprika, garlic powder, onion powder, cayenne, salt, pepper, and brown sugar.
3. Coat the thighs with olive oil, then rub the seasoning mixture generously over each piece.
4. Let them rest at room temperature for 30 minutes to absorb the flavors.
2. Setting Up the Pellet Grill
1. Preheat your pellet grill to 225°F.
2. Fill the hopper with hickory or applewood pellets for a rich, smoky flavor.
3. Place the thighs skin-side up on the grill grates.
4. Smoke for 1.5 to 2 hours, or until the internal temperature reaches 165°F.
3. Achieving Crispy Skin
1. Increase the temperature to 375°F and let the thighs cook for another 5-7 minutes.
2. Brush with BBQ sauce in the last 5 minutes for a delicious glaze.
3. Remove from the grill and let rest for 10 minutes before serving.
Recommended Products for the Perfect BBQ Experience
1. Traeger Grills Pro Series 575 Wood Pellet Grill
This high-quality pellet grill offers WiFIRE technology, allowing you to control temperatures remotely from your phone. It provides consistent heat, ensuring your chicken thighs come out perfectly every time.
Get yours on Amazon now! Click here
2. MEATER Plus Smart Meat Thermometer
Say goodbye to overcooked or undercooked chicken! This wireless meat thermometer syncs with your phone, allowing you to monitor your chicken’s internal temperature in real-time.
Check it out on Amazon! Click here
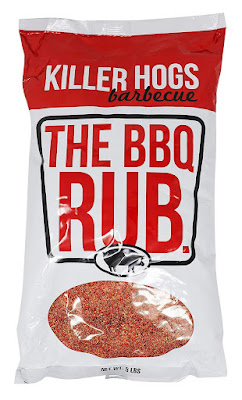
For an extra boost of flavor, this blend of sweet, smoky, and spicy seasonings enhances your smoked chicken thighs effortlessly.
Try it today on Amazon! Click here
Ways to Cook Smoked Chicken Thighs
If you’re looking to mix things up, here are some variations:
Pro Grilling Tips for Success
1. Use a meat thermometer – This ensures juicy, perfectly cooked chicken.
2. Avoid constantly flipping – Let the smoke work its magic.
3. Let the chicken rest – Resting redistributes juices, making each bite flavorful.
4. Experiment with wood pellets – Try cherrywood for a slightly sweet twist.
Final Thoughts & Serving Ideas
Smoked chicken thighs are an absolute crowd-pleaser—crispy on the outside, tender and juicy inside, with an irresistible smoky depth of flavor. Pair them with classic BBQ sides like grilled corn, coleslaw, or baked mac and cheese for the ultimate backyard feast.
Now, it’s your turn! Fire up that pellet grill, try this recipe, and let me know how it turns out in the comments. Happy grilling!


Comments
Post a Comment