How to Make the Perfect Cherry Pie with Canned Filling (No One Will Know!)
There’s something so nostalgic about a warm, sweet cherry pie fresh from the oven. It’s a perfect summer picnic dessert, an easy-to-make sweet treat, and a fantastic way to impress guests without spending hours in the kitchen. But let’s be honest—making cherry pie from scratch can be a bit overwhelming. That’s why I’ve perfected an easy cherry pie recipe with canned filling that tastes just like homemade! The secret? Enhancing the filling, using the right premade crust, and adding a buttery crumb topping that makes each bite irresistible.
I remember the first time I made cherry pie with canned filling. I was in a hurry, entertaining last-minute guests, and needed a quick dessert. I grabbed a premade crust, a can of cherry filling, and experimented with a few extra ingredients to make it taste like I had spent all day in the kitchen. The result? Everyone raved about it, and no one guessed it wasn’t made from scratch. That’s when I knew I had to share this best cherry pie recipe with canned filling with all of you!
This post may contain affiliate links at no extra cost to you. Please read our full disclosure here to find out more.
Why This Cherry Pie Recipe Is the Best
It’s great for any occasion, from weeknight treats to summer picnics.
You don’t need fancy equipment—just basic ingredients and a pie dish!
Ingredients You’ll Need
For the Pie:
For the Crumb Topping:
Step-by-Step Instructions
1. Preheat and Prepare the Crust
Preheat your oven to 375°F (190°C). If using a premade crust, let it come to room temperature for a few minutes before unrolling it into a 9-inch pie dish. Press it gently into the dish, crimp the edges for a decorative touch, and set it aside.
2. Enhance the Cherry Pie Filling
While canned cherry filling is convenient, adding a few extras makes a world of difference. In a mixing bowl, combine:
3. Make the Crumb Topping
In a separate bowl, mix together:
4. Bake the Pie
Place the pie in the oven and bake for 40-45 minutes, or until the topping is golden brown and the filling is bubbling. If the edges of the crust brown too quickly, cover them with aluminum foil halfway through baking.
5. Cool and Serve
Let the pie cool for at least 2 hours before slicing. Serve with a scoop of vanilla ice cream for the ultimate sweet treat!
Must-Have Kitchen Tools for the Perfect Pie
To make this cherry pie even easier, here are my top Amazon product recommendations:
1. Best Premade Pie Crust: Keebler Ready Pie Crust
Why You’ll Love It: This crust bakes up flaky and golden, just like homemade. It’s easy to use and always reliable.
2. Top-Rated Cherry Pie Filling: Duncan Hines Comstock Cherry Pie Filling
Why You’ll Love It: It has real fruit chunks, the right balance of sweet and sour, and no artificial aftertaste.
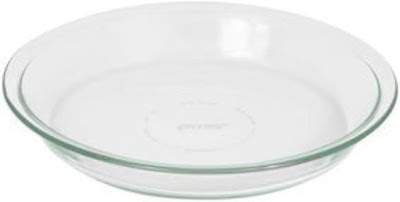
3. The Perfect Pie Dish: Pyrex 9-Inch Glass Pie Plate
Why You’ll Love It: Durable, easy to clean, and distributes heat evenly for the best results.
Tips & Tricks for the Best Cherry Pie
Serving & Pairing Ideas
This pie is delicious on its own, but pairing it with a few extras takes it to another level:
For a summer picnic, I love making mini cherry hand pies using the same recipe but with pre-cut circles of premade crust folded over the filling. They’re easy to transport and perfect for outdoor gatherings!
Conclusion
There you have it—the best cherry pie recipe with canned filling that’s so easy to make, yet tastes completely homemade. With a premade crust, a few secret ingredients, and a buttery crumb topping, no one will ever know you took a shortcut!
I’d love to hear from you! Have you tried this recipe? What’s your favorite way to enjoy cherry pie? Leave a comment below and let me know. Happy baking!


Comments
Post a Comment